
Like most of us that struggle to sleep during hot weather, I was quite frustrated at not being able to maintain a healthy sleep pattern. One evening saw temperatures of 40°C with 70% Humidity.
Being unable to sleep and with my mind racing off on bizarre tangents, I decided to build a quick and easy Arduino Temperature Display. The temperature and Humidity sensor is the venerable DHT11, a sensor that has been around for many years. It is not the most accurate (5%) and the update rate is quite slow at two updates per second but it nonetheless, gets the job done.
We simply do not need Millions of samples per second and eight decimal points of resolution!
Hardware:
1 x Arduino UNO R3
1 x DHT11 Temperature / Humidity Sensor (The DHT22 also works and is pin for pin compatible)
1 x LCD 16×02 with I2C Adapter
Please excuse the crudity of the image, I didn’t have time to build it to scale or to paint it.
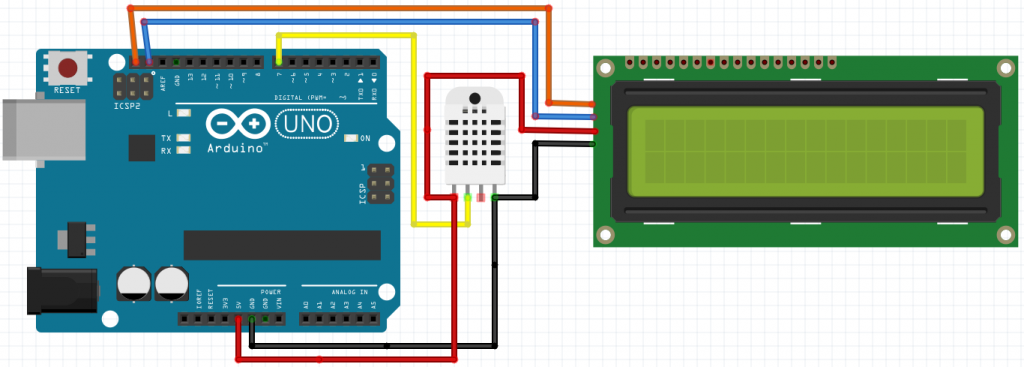
Connect the LCD to the Arduino
Orange = SCL
Blue = SDA
Red = +5VDC
Black = GND
The rear of the LCD can be seen below.
Make sure you don’t confuse the power and ground lines!
The little blue potentiometer controls the contrast. It should be set just about right from the Factory.
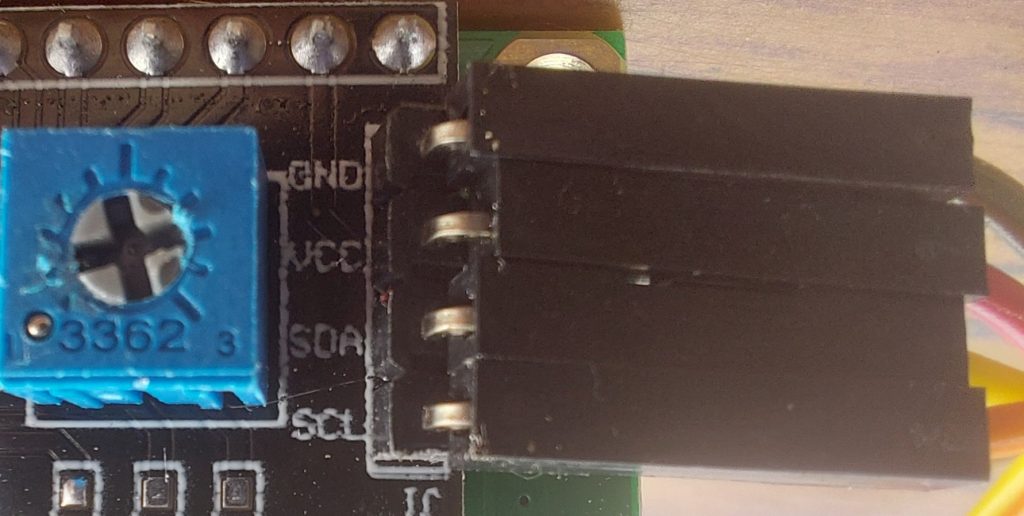
The SCL (Clock) and SDA (Data) lines can be seen on the UNO R3 on the left in the image below.
(Orange and Yellow Wires)
The white wire comes from the Data pin on the DHT11 Sensor
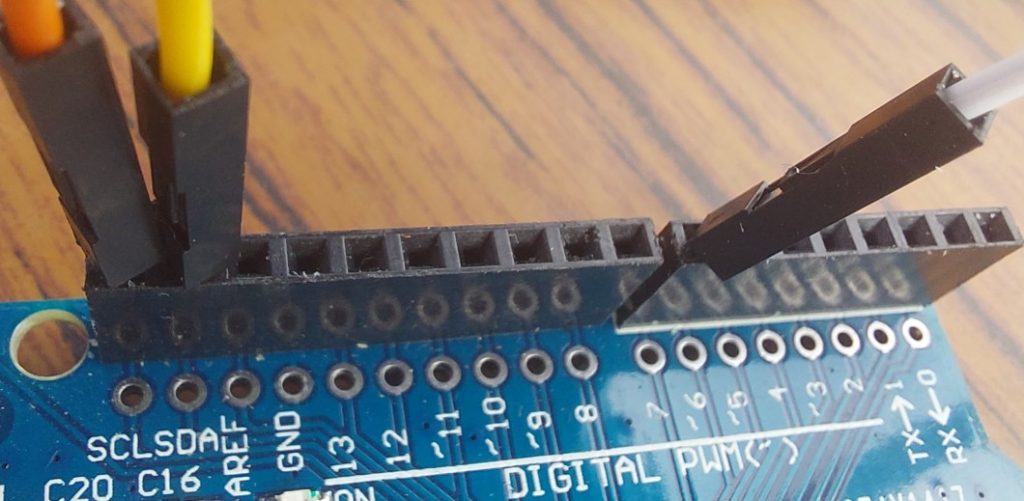
Now lets connect the DHT11 Temperature and Humidity Sensor.
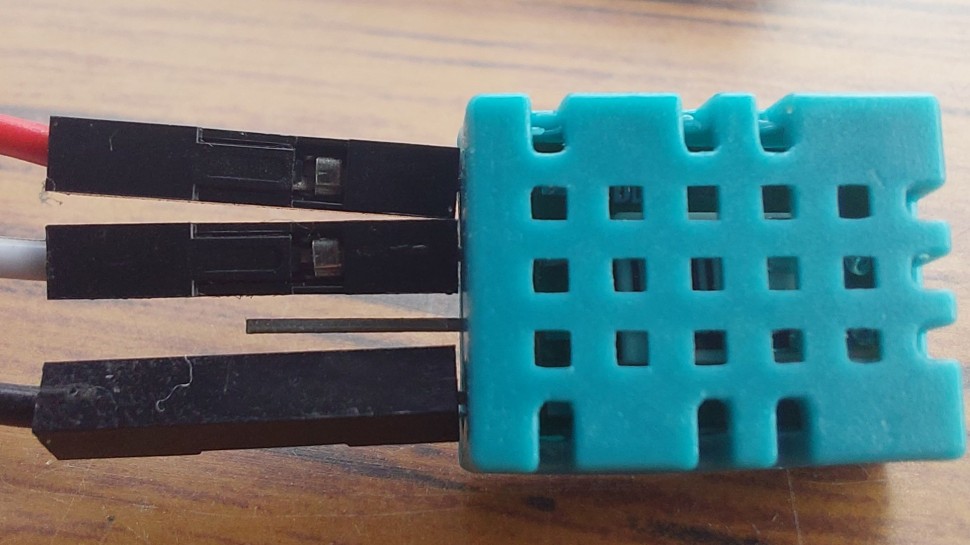
Red – Connect to 5v on Arduino
White – Connect to Pin 7 on Arduino
Black – Connect to GND on Arduino
Notice that the THIRD pin in NOT connected.
Congratulations, you have just built some hardware!
Now it is time to upload the code to the arduino so it all works
Launch the Arduino IDE on your Pc / Laptop
You will need to install the library below and you should also install the Unified Sensor Library AND DHT11 or DHT22 Libraries.
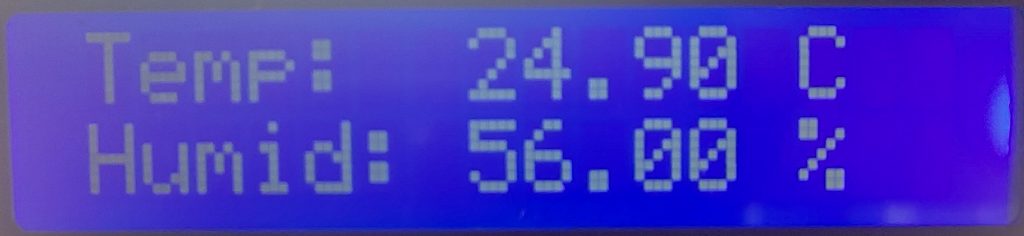
Once these have been installed, you can then upload the code to your Arduino. Once done, hit the reset button and watch the Display come alive with the Temperature and Humidity.
As a side note, it is also perfectly possible to use this to set a threshold for the temperature and to use a Transistor switch to engage a Fan Cooler or A/C circuit.
I you have any problems getting the code running please contact me and i’ll send you the HEX code to put in your Arduino.
You will need the “NewLiquidCrystal” library to enable I2C communication.
The sought after NewLiquidCrystal that allows 16×02 LCD devices to be accessed via I2C
https://github.com/wykeradio/DHT11-Temperature-and-Humidity-Display















You must be logged in to post a comment.